Introduction
Alphafold2
AlphaFold2 ( AF2 ) is a deep learning-based system developed by DeepMind to predict the 3D structure of proteins from their amino acid sequences. The algorithm uses Multiple Sequence Alignment (MSA) to determine the interactions between distant amino acids and infer the protein’s 3D structure ( https://www.nature.com/articles/s41586-021-03819-2 ) . The MSA information is paired with a transformer neural network, a type of model known for its success in understanding the context in natural language processing tasks. AF2 can also use information extracted by structural templates to refine the structure. Even though it has been primarily developed to predict monomers, it has been further adapted to predict multimers (https://www.biorxiv.org/content/10.1101/2021.10.04.463034v1 and https://www.nature.com/articles/s41467-022-29394-2).
Why serverless Alphafold2?
Even tough AF2 code is freely available, as the majority of deep learning models you need a powerful GPU to get the best out of it. If you don’t have access to a GPU cluster but still you want to perform a prediction, you can use google collab to run AF2 taking advantage of ColabFold ( https://colab.research.google.com/github/sokrypton/ColabFold/blob/main/AlphaFold2.ipynb )
Even if Google Colab is an incredibly valuable tool for many projects, it does have some limitations:
- Resource Limitations: After a certain period, your session will time out, and you'll lose all the data stored in the instance's RAM. Furthermore, you may experience slower processing times if the servers are heavily in use.
- Storage Limitations: Colab does not offer permanent storage. You can connect it with Google Drive, but the maximum storage space depends on your Google Drive account, which might not be enough for larger datasets.
- Privacy Concerns: As your code is run on Google's servers, it may not be suitable for sensitive, confidential, or proprietary data.
- Limited Offline Capabilities: Colab notebooks are designed to be used online and have limited offline capabilities.
You have also time restrictions because a single session can run for a maximum of 12 hours. This is not usually an issue for AF2 because each prediction takes maximum couple of minutes and a bit longer if you have to build the MSA from scratch.
In order to surpass these limitations, I delved into serverless computing. In serverless computing, the cloud provider manages the infrastructure and automatically allocates computing resources as needed to execute and scale applications. This model is often used for event-driven computing, such as microservices, APIs, and mobile and web applications. You pay only when you use the resource.
The purpose of this tutorial is to enable you to submit a prediction to runpod workers with a command as simple as:
python3 launch.py --msa your_structure.fasta --output your_structure.pdb --endpointId your_endpoint
While the meaning of the options --msa and --output is quite clear, you will learn the meaning of --endpointId in a few minute.
Refactoring AF2
Before delving into the main topic, let’s briefly discuss the need to refactor AF2. The official implementation, provided by DeepMind, follows a specific workflow: it takes a sequence as input, generates a Multiple Sequence Alignment (MSA), and then utilizes a deep learning model to make predictions. However, this structure is not adapt to serverless computing.
Firstly, acquiring the sequences to build the MSA involves scanning multiple databases, which must be available locally. These databases can reaching up to 4 terabytes of data. This sheer size makes hosting them on cloud platforms not practical.
Second, this approach lacks flexibility because it doesn’t provide an option to supply your own custom MSA. This limitation can be a hindrance when you have specific MSA requirements or preferences.
We need then to decouple the MSA generation from the structure prediction. Additionally, I wanted to enhance the tool’s usability by enabling it to read multiple file formats, including the default a3m format, Stockholm format, and FASTA files ( I hate converting files to run a tool).
To achieve this, I began by examining the repository maintained by Sergey Ovchinnikov, available at https://github.com/sokrypton/alphafold/. If you’re considering working on AlphaFold 2 (AF2) or similar projects, I highly recommend starting with this optimized repository rather than the one provided by DeepMind. For additional insights into the optimization strategy employed, you can refer to this tweet by Sergey Ovchinnikov: https://twitter.com/sokrypton/status/1535941266579640320. This tweet provides valuable information on the approach used for the optimization process.
From there, I further refactored the code, removing redundant checks on the MSA and restructuring the Python code to make it modular making the code easy to import as a module. You can find the resulting code on my GitHub repository at https://github.com/oteri/alphafold_MSA.
RunPod platform description
There are several providers for GPU on the cloud, but very few for serverless GPU ( check this article if you want a list: https://fullstackdeeplearning.com/cloud-gpus/). I’ve chosen runpod ( https://www.runpod.io ) for this tutorial because it has a simple API and a rich documentation with several examples to use as inspiration.
RunPod allows you to have both a GPU on a VM or serverless fashion. To use the serverless option, you must create a template and an endpoint.
A template, in RunPod terminology, is a Docker container. To define a template, you must supply the Docker image, the amount of disk needed for each container, and optionally, the Docker command to run it.
An endpoint represents the actual set of workers. You can set up the minimum and maximum number of workers, the autoscaling policy, and optionally, a shared volume ( that get automatically mounted at the “/runpod-volume”). This last option is particularly valuable for machine learning tasks because it can be used to store model weights that can be loaded at runtime without the need to download them repeatedly, and in general, to share data.
Whenever an endpoint is instantiated, a new template is spun up. When an endpoint is invoked, either a new job is queued on a running worker or a new one is instantiated. I suggest you to read the latest documentation at https://docs.runpod.io/docs/overview
Now, let’s see how to practically set up RunPod to serve our purposes.
Setup the system
Once logged in, you need to setup the system ( Settings tab )
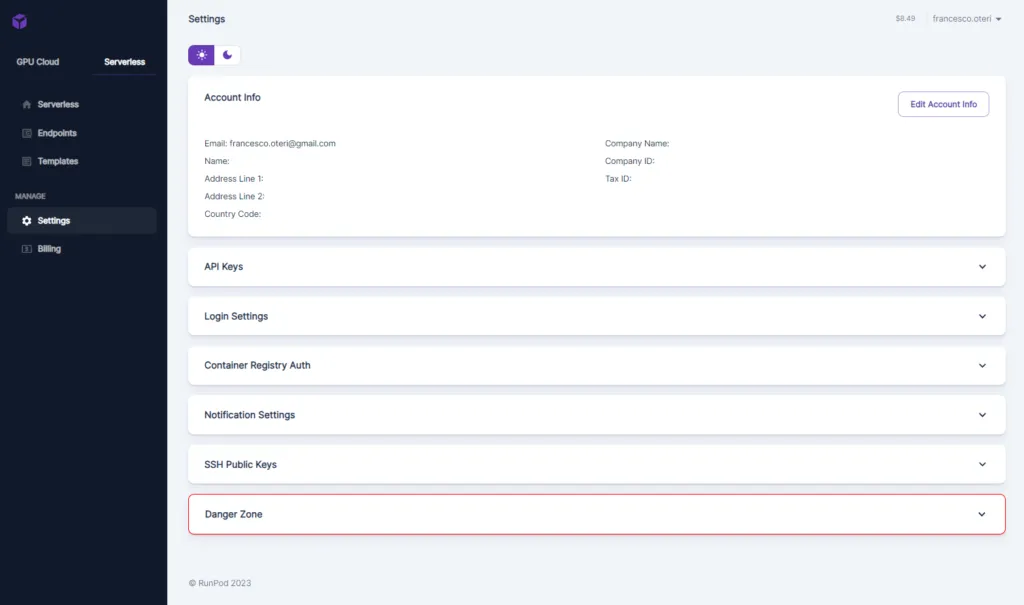
The most important parameter is the “API Keys” tab:
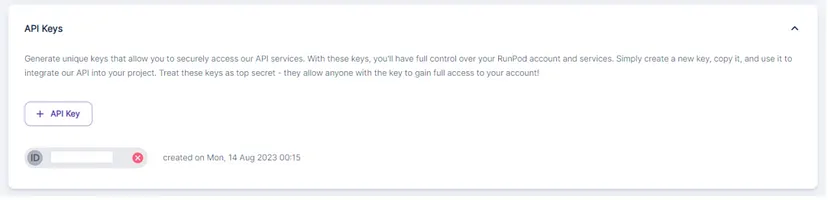
Click on “+ API Keys” button to create any API_KEY. Copy it because you will need it later on.
Setting up a Network Storage
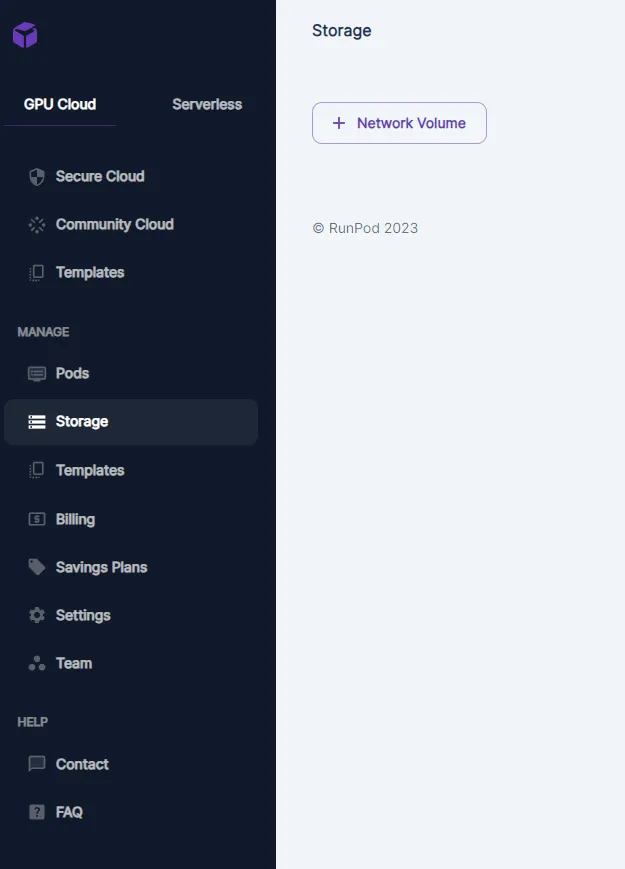
Since we don’t want to download the model weights each timle a worker is instantiated, we need a networek shared volume to store the weights.
To setup a network storage, go to Storage , then click on “+Network Volume”
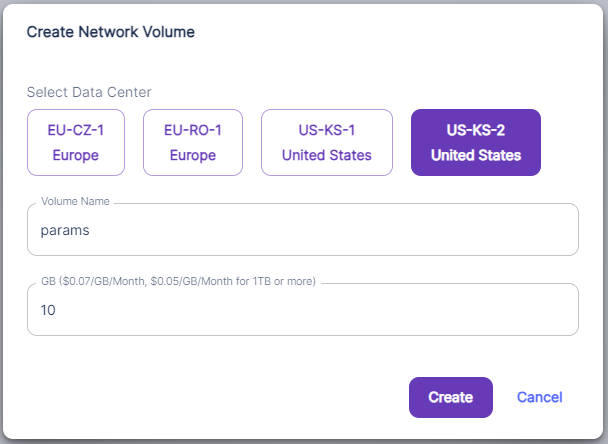
You will be presented with a dialog to setup name, size and region of deployment of the volume:
Setting up a Template
To setup a template, start clicking on “Serverless”, then “Templates” and finally on “New Template”
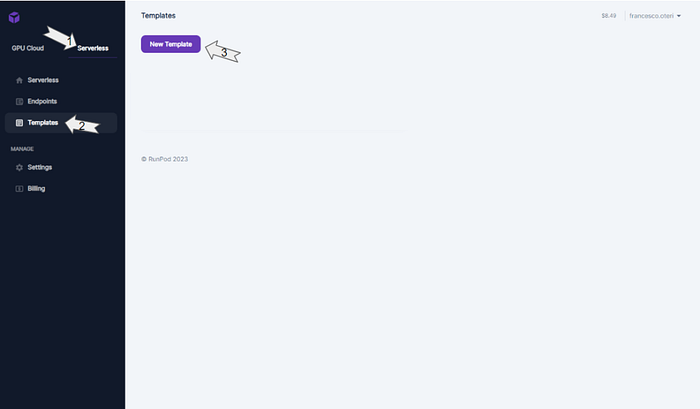
You will be presented with a dialog that enables you to setup your template:

The most important parameter is the container name. It is actually the name of the image used for deploying a worker. For this tutorial, we will be using the image francescooteri/af2_msa_serverless:latest ( you can find the code on my github account: https://github.com/oteri/alphafold_serverless ) . The image installs alphafold_MSA, downloads the models from google servers and stores them on network attacched disk (whose path is specified by the environment variable PARAM_DIR) . The default command is used to run a prediction, you need to set it here only if you want to override the one in the container. We also setup the variable WORKDIR that allows to specify where you want the system to put the data used at prediction time.
Setting up an Endpoint
This is the procedure to setup a serverless worker on RunPod
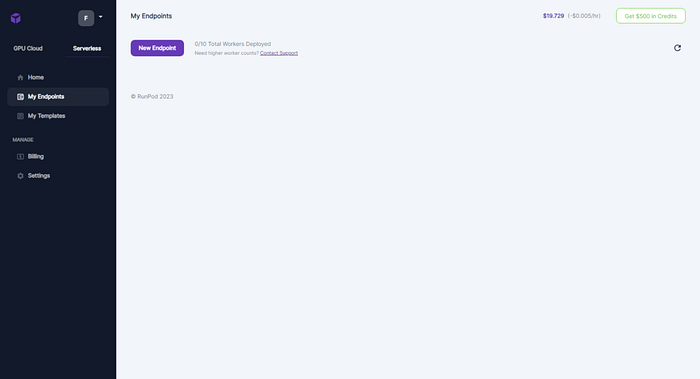
- Setting up the workers ( you need at least 10€ in credit to create one). Go on “My Endpoints” and click on “New Endpoint”.
2. Configuring the endpoint.
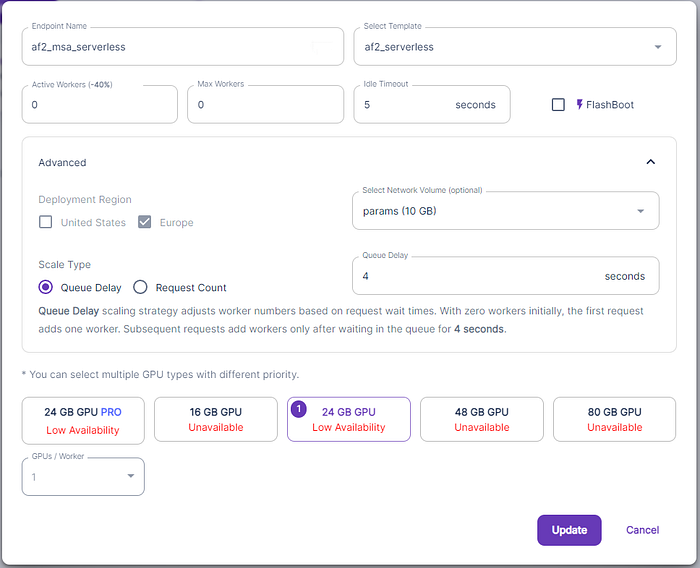
Several parameters are available:
- Endpoint name: is a mnemonic text that identifies the endpoint
- Template: is the template with the image to run.
- Min and Max provisioned worker: the minimum and maximum number of workers you want to deploy.
- Idle timeout: the number of seconds the worker stays awake without any work before shutting down.
- GPUs: the GPU to use for this pool of workers. You can choose several GPUs
- We also selected the Network Volume.
The parameters “Min provisioned worker”, “Max provisioned worker” and ”Idle timeout” are meant to setup the reactivity of the system to new requests. Their value are a compromise between cost savings and reactivity of the app. If you want to save as much as possible, you want to put “Min provisioned worker” to 0 and ”Idle timeout” as low as possible so that the system goes down when it is not used. If you want to increase the reactivity, you will have “Min provisioned worker” greater than 0 ( so that a worker is always ready to serve a request). Alternatively you want to increase ”Idle timeout” so that a worker doesn’t shut down immediatley after the last usage. For debugging purpose though, you want to select Min and Max equal to 1. This cause the worker to never sleep so you can ssh to it and debug the issues.
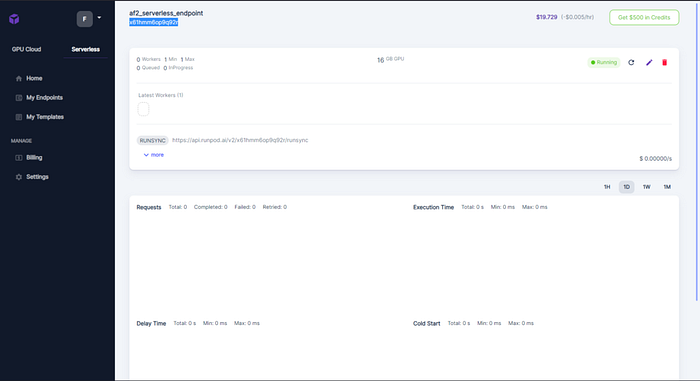
- Once the endpoint is created, copy paste its endpoint id ( in this case x61hmm6op9q92r ), we will need it to submit our job
Let’s dive in the code
So far you are using what has blindly been provided to you. Now, let’s go in the details.
When an http request hits the endpoint, runpod spuns a container and the default command is run. The basic requirement for such a command to be compatible with runpod infrastructure is to invoke the function runpod.serverless.start ( the package runpod must be installed in the image used for the template):
import runpod
def handler(event):
do something
return the result as json

runpod.serverless.start({
"handler": handler
})
/app/handler.py runs the script that performs the actual prediction. Here I show an edulcorated version of the script:
WORKDIR = os.environ.get("WORKDIR", "/data/")
def handler(event):
    # Prepare the name for the MSA
    job_dir = tempfile.mkdtemp(dir=WORKDIR)
    msa_file_path = os.path.join(job_dir, "msa.fasta")
    with open(msa_file_path, "w") as file:
        file.write(event["input"]["msa"]) # Save event.msa to WORKDIR/msa.fasta
    run_prediction(precomputed_msa=msa_file_path, output_dir=job_dir, data_dir="/data/")
    # Read the output file.
    # runpod doesn't allow to manage more than 2MB so only the best result is returned.
    # If you want to store more, use a bucket and the object id instead.
    output_file_path = os.path.join(job_dir, "msa/ranked_0.pdb")
    with open(output_file_path, "r") as file:
        output_content = file.read()
        return json.dumps({"structure": output_content})
runpod.serverless.start({"handler": handler})
In our scenario, we also need to verify whether the model weights already exist on the shared volume. This check is performed each time a worker is created. The worker examines if the parameters are available in a pre-defined folder ( /runpod-volumes/params ) and downloads them only if they are not already present. This is the resulting bash script run as default command ( start.sh ). This script handles the verification process and subsequently executes the actual handler once the check is completed:
#!/bin/bash
set -x
date

# Check if PARAM_DIR is unset or empty
if [ -z "$PARAM_DIR" ]; then
PARAM_DIR="/data/"
fi
# Check if the directory exists, and create it if it doesn't
if [ ! -d "$PARAM_DIR/params" ]; then
mkdir -p "$PARAM_DIR/params"
echo "Directory $PARAM_DIR created."
cd $PARAM_DIR/params
wget -qO- https://storage.googleapis.com/alphafold/alphafold_params_2022-12-06.tar| tar xf - --no-same-owner
fi

cd /app/
export PYTHONUNBUFFERED=1

export LD_LIBRARY_PATH=/app/env/lib/:${LD_LIBRARY_PATH}
micromamba run -p /app/env/ python3 -u /app/handler.py
Submission of a Prediction
At the beginning, I promised you to make prediction submission as easy as:
python3 launch.py --msa your_msa.fasta --output your_structure.pdb --endpointId your_endpointWhen it comes to submitting requests to the endpoint, it’s a straightforward process. When an endpoint is created, it automatically generates an API endpoint that you can use for communication. The endpoint address is: https://api.runpod.ai/v2/endpointId/task. In our example, the endpointId is x61hmm6op9q92r and the 'task' parameter specifies the function you want the endpoint to perform. There are various available actions; you can refer to the documentation for more details.
In this tutorial, our main focus revolves around 'run' and 'status.' The 'run' function allows you to transmit data to the endpoint, initiating the computation process. The system autonomously manages workers start. The newly created job then joins the queue of one of the active workers. After you've submitted the job, you'll be furnished with a 'job_id,' which allows you to monitor the job's progress and retrieve the outcomes.
Regarding authentication, the system utilizes the Bearer system, which requires the use of both the ‘API_TOKEN’ and an authentication token for security.
Keeping this in mind, submitting a job is as easy as this:
# Read the content of the MSA file
msa_content = ""
with open(args.msa, "r") as file:
    msa_content = file.read()
    payload = {
    "input": {
        "msa": msa_content,
        }
    }

headers = {
"accept": "application/json",
"content-type": "application/json",
"authorization": f"Bearer {API_TOKEN}",
}

logger.info("Submitting job")
response = requests.post(url, json=payload, headers=headers)
As usual, response.status_code == 200 means that the job has been correctly submitted. We can now get the job_id
response_dict = json.loads(response.text)
job_id = response_dict["id"]
and use it to poll the server until the prediction is completed:
url = f"https://api.runpod.ai/v2/{args.endpointId}/status/{job_id}"
headers = {
"accept": "application/json",
"authorization": f"Bearer {API_TOKEN}",
}
response = requests.get(url, headers=headers)
response_dict = json.loads(response.text)
status = response_dict["status"]
status can be either of IN_QUEUE, IN_PROGRESS, FAILED, COMPLETED.
When the job is correctly completed we get status==COMPLETED and the result is in response_dict["output"].
if status == "COMPLETED":
    output_file = f"{job_id}.pdb" if args.output is None else args.output
    response_output_dict = json.loads(response_dict["output"])
    with open(output_file, "w") as file:
    file.write(response_output_dict["structure"])
    break
You can find complete code in launch.py in the accompanying repository ( https://github.com/oteri/alphafold_serverless )
And now, submitting a job becomes as easy as:
python3 launch.py --msa your_msa.fasta --output your_structure.pdb --endpointId your_endpointMeanwhile, you can observe what is going on on the worker logs:
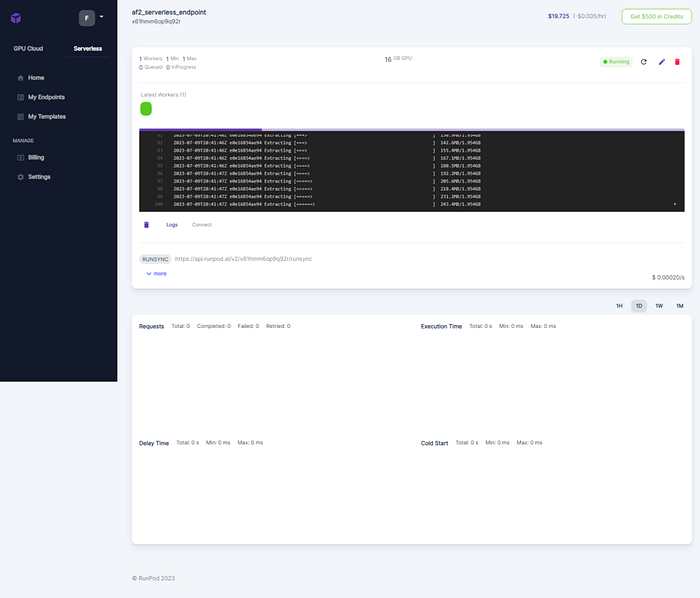
Submitting the job, triggers the building of a new worker if the number of worker is not enough. Here, the 1st time the job is submitted a new worker is instantiated and when it run a green box is showed.
Once the job starts you have the job id

And the resources are showed on the dashboard:
As well as the system logs
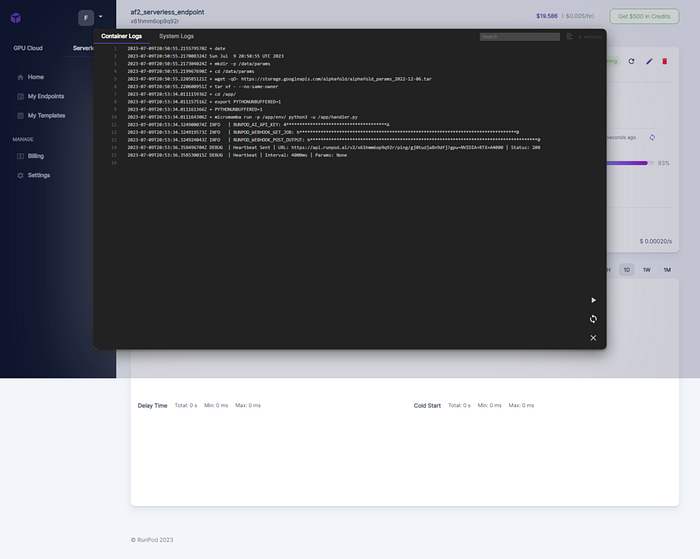
If you are debugging, RunPod interface gives you the command that you can simply copy/paste to ssh into it. As long as the worker is active, the connection is open.

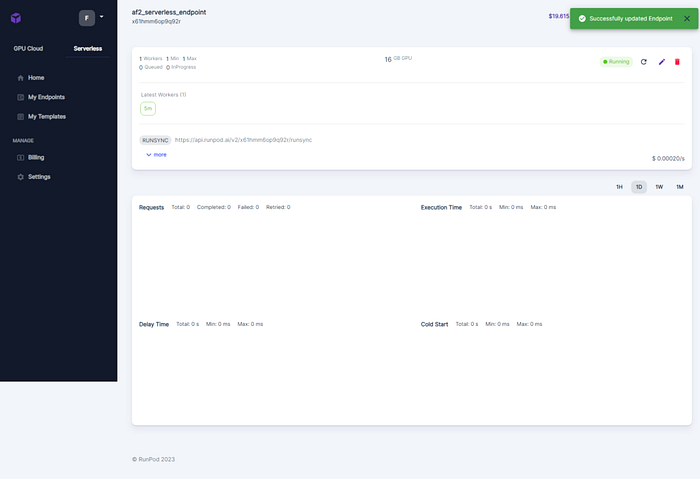
And voilà, once the job is completed, you will find your predicted structure as a pdb file.
Getting a MSA
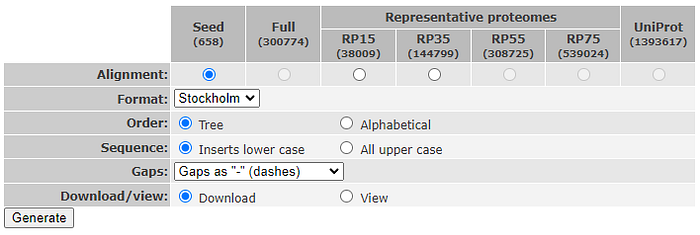
The last step, is getting the MSA to use. If you are just testing, you can use a precomputed MSA taken from PFAM. In my tests I have used HATPase_c (PF02518) as stored on PFAM ( http://pfam-legacy.xfam.org/family/PF02518 ). Approximately 100 pdb structures are available for this family. The full MSA is built by 300774 sequences, but I will be using the seed alignment that contains only 658 sequences and can be directly downloaded as fasta file from PFAM website. Remember to download the version with gaps represented as ‘-’
Limitations
- Each time a new MSA is sent to AF2, the model must be recompiled. Probably this time could be reduced or the model could be somehow be compiled and cached on disk.
- File size both for input and output is limited to 2MB, so data should be saved on a S3 bucket to overcome such a limitation ( you have good documentation here https://docs.runpod.io/docs/sync-my-volume-to-a-cloud-provider )